
Radio Fuji: RoboSHOOT TTL Triggers for Fuji
It isn’t often that a third party comes out with a product long before a brand, especially something that’s de riguer with most makers now. That’s exactly what Serene Automation have done with their RoboSHOOT TTL Triggers for Fuji.The State of Fuji FlashFlash is the weakest link in the X-Series System by a large margin. Their current flagship flash is the EF-42, a rebranded Sunpak flash. It’s more in keeping with the, larger, older S Pro cameras than the compact X-Series cameras (something the competing Nissan i40 can lay claim to). Power wise it matches the Canon 430EX or the Nikon SB600, rather than that of the Canon 580/600ex or Nikon SB910. This will all change with the brand new EF-X500 touted for a May landing. It swaps the measly GN 42 for GN50, almost that of the Canon’s at GN52. The X-Pro2 has already been delayed by a month, so hopefully that won’t affect the timeline for the EF-X500. As well as the increased power, the EF-X500 will be the first Fuji flash to allow a master/slave control, via optical control, similar to Nikon’s CLS. Even Nikon are moving into radio TTL, so for a flagship flash, it’s already a generation behind. Even third partly products like the Yong Nuo 600 series, or Godox v860’s are already TTL radio based. So while the EF-X500 is a blessing for Fuji users, it’s still got catching up to do.
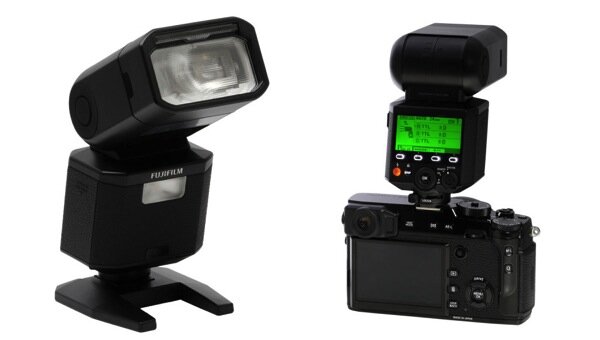 With the lack of any TTL remote control in camera, until recently the only way to get the flash off camera with TTL was to use a TTL cable. There is a limit to length of course, and the possibility of accident, either by tripping, or by pulling the light down. Neither are optimal.
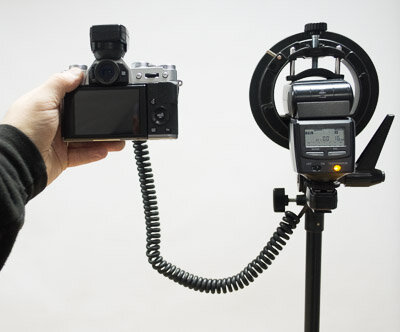 Introducing the RoboSHOOT TriggersThis long introduction is leading up to the key feature of the RoboSHOOT triggers; that is, they provide TTL control of Fuji flashes via radio. Not only that, but they also allow most modern TTL Nikon flashes to be used in TTL mode, as if they were native flashes to Fuji. This is a huge boost to those that are changing, or supplementing their existing Nikon setup with Fujifilm X-series cameras.
 The RoboSHOOT triggers come in a basic black box, with a transmitter and receiver in a moulded clear plastic tray. Included are a set of cables for remote camera triggering (another useful feature of the trigger), and a cloth bag with 2 internal pouches for safe keeping of the triggers. There’s a quick guide and a fuller manual included as well.
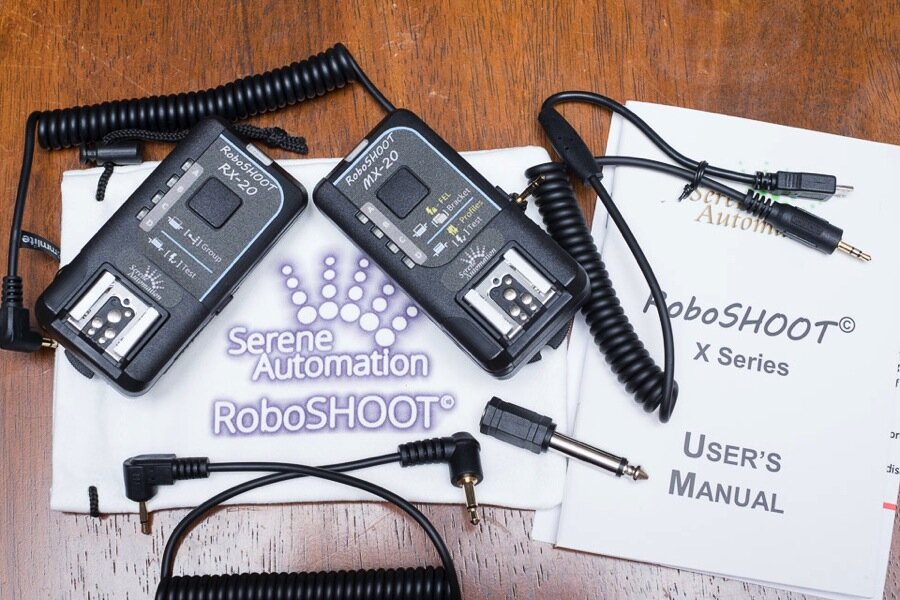 A cursory look at the triggers shows they’re similar to most other triggers on the market. The transmitter has a metal hotshoe foot with a screw down grip, rather than the lever based ones that appear on most newer flashes now. I’ve had issues with the version on my Godox V860c, so I do prefer the newer design. However the triggers are quite light, and I know my issue is related to the weight of the flash, so I wouldn’t expect it to be a problem with the trigger. There’s an on-off button on the side, one push button on top, some LEDS, and a Flash button. There’s a pass through hotshoe on top, so this system can be mixed with other trigger systems. A sync port is on the receiver. The transmitter has a shutter release output to camera and an external trigger port input from switch or sensor. There’s no screen-something that’s notable as most transmitters sport one these days-We’ll come back to that shortly though. The receiver has a plastic foot with a screw thread for fitting on a light stand. Besides this, it looks similar to the transmitter.The RoboSHOOT AppThe reason why the transmitter lacks a screen is because there’s 'an app for that'. Control is via a free iOS or Android app. Most people have one or the other available in some form. iOS requires 8.3 or higher (so my lowly iPhone 4s was ruled out), whereas Android has lower requirements. I ran the app with no issues on a Samsung Galaxy Tab 3 7 inch. The app connects to the triggers via Bluetooth and is a breeze to use.From the app, you can control up to 4 groups of flashes in either TTL (with flash exposure compensation) or in manual increments from 1/1 power down. To set the group on the receiver, press the top button down and the A B C D buttons will light up with the next channel. Repeat until you get the to the desired channel. The app also allows you to do firmware updates to the triggers. Taking a look at the app in more detail.Before you begin, turn on Bluetooth and pair with the RoboSHOOT triggers. Run the app. From the launch screen, click the Connect Button to begin or use App Settings to make changes (check the manual for more details).
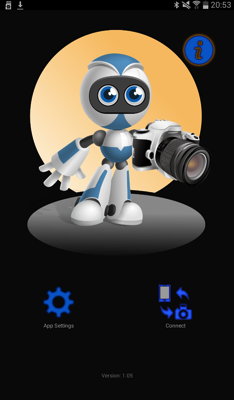 The main screen opens. I've the Zoom option on, so this screen shows the 4 Flash Groups (A,B,C & D), the zoom for each flash, and the Exposure compensation value. The Green 'Light' on the B channels shows that there's a trigger on connected to B. Each Group can be turned off using the group switch. At the bottom you can test the flash using Check. Hold down the Flash icon to turn off all the flashes. You can also see the battery strength of the triggers as well as the camera's status.
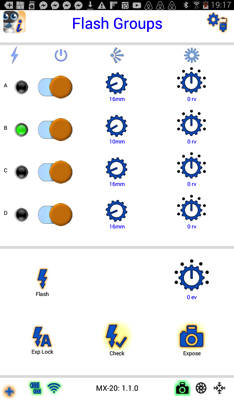 Flash control isn't the thing that the triggers can do. Press the + button to bring up more options.
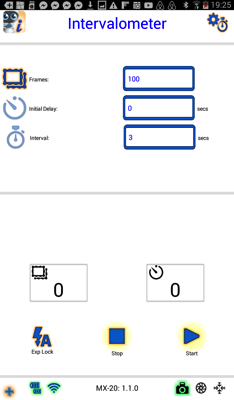
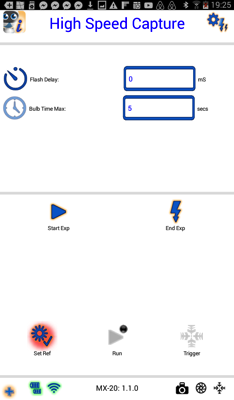
 Cycle through them to see the Timer, the Intervalometer, High Speed Capture and External Trigger screens.
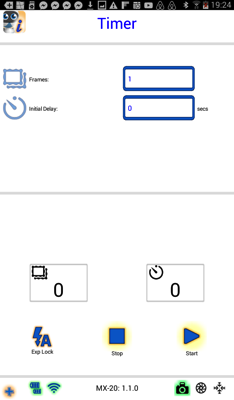
 Getting StartedTo get the whole setup working, the manual says to turn everything off. First attach the flash to the triggers and to the camera. Next turn on the flashes, finally the camera. It’s key that the pin in the trigger lines up correctly on the camera for a connection to be make. The manual mentions you may have to wiggle it into position. I had trouble with getting the camera to see the trigger initially. In the end, I left the camera on when I attached the transmitter and moved it until I saw the flash symbol appear on the center left of the rear screen. All was good then. When operational, both the transmitter and receiver have a green LED on the front. Other colours and flashing states have various meanings. Blue, for instance means that a bluetooth connection has been made. Unfortunately knowing the other combinations means memorizing the meanings or having the manual with you, a minor minus point in my opinion. Yes, you can access the manual via the app, but this isn’t as convenient as other systems. (Note that there's been a hardware upgrade that improves the connection, more further down). Bear in mind that my triggers are pre-production versions, so the wiggle issue has been fixed.First ImpressionsThat’s the technical, so let’s go practical instead. My first test was simple shots of my son via the traditional method of bribing with treats. Hence there aren’t any really usable photos. Nevertheless, I was well impressed. For the initial setup, I was using the EF-42 with no modifiers. Flash exposure was dead on with each shot in TTL mode. Surprisingly so as TTL can be hit or miss. By way of background, I shoot TTL in nightclubs at least twice a week, so I’m used to seeing how one person with a white shirt in a group can completely throw the flash exposure off.For my second test, I put the flash into a small softbox, meaning no line of sight for the flash (not an issue for radio triggers obviously). Again each exposure was perfect. As I was using only one flash, I tested exposure compensation via camera settings rather than the app. Adding or reducing the flash exposure was mirrored exactly as expected. Honestly, I couldn’t fault the operation in this regard.Flash CompatibilityMy other camera system is Canon, so I didn’t have the luxury of trying a Nikon TTL just then. I did have a Nikon SB-28dx available. I normally use this former top of the line flash (for their film cameras) in manual mode off camera. The RoboSHOOT had no issues triggering this flash, albeit as a dumb trigger with no remote power control.Serene Automation do provide a list of compatible flashes:
| Brand | Model | Rating | Power On/Off | Recycle Time | Best for |
| Fujifilm | EF-42 | *** | Yes | Fair | General Use |
| Fujifilm | EF-X20 | * | No | Poor | Macro/Travel |
| Nikon | SB-910* | ***** | Yes | Excellent | Portrait |
| Nikon | SB-900* | ***** | Yes | Excellent | Portrait |
| Nikon | SB-700* | *** | Yes | Good | General Use |
| Nikon | SB-600 | *** | Yes | Good | Macro/General Use |
| Nissin | i40 (Fuji) | *** | Yes | Good | Macro/Travel |
Additional compatible flashes are listed on the Serene Automation Compatibility page. Nikon flashes with a * need to be in TTL mode to work, with manual control provided via the App.Practical TestingThe real test is of course getting out there and using the system. So armed with the RoboSHOOT triggers, an EF-42, my X-T10 and a few lenses, I went to an industrial area near the studio to shoot with local model/radio & TV personality Laura Fox. Based on my initial test, I decided to shoot with a softbox. You can see the general modifiers I use with Speedlites in this post. For this shoot I went with the Godox Elinchrom Bracket and the basic Elinchrom Portalite 65cm square softbox. The BTS shot is a little shaky-it was more of an afterthought really!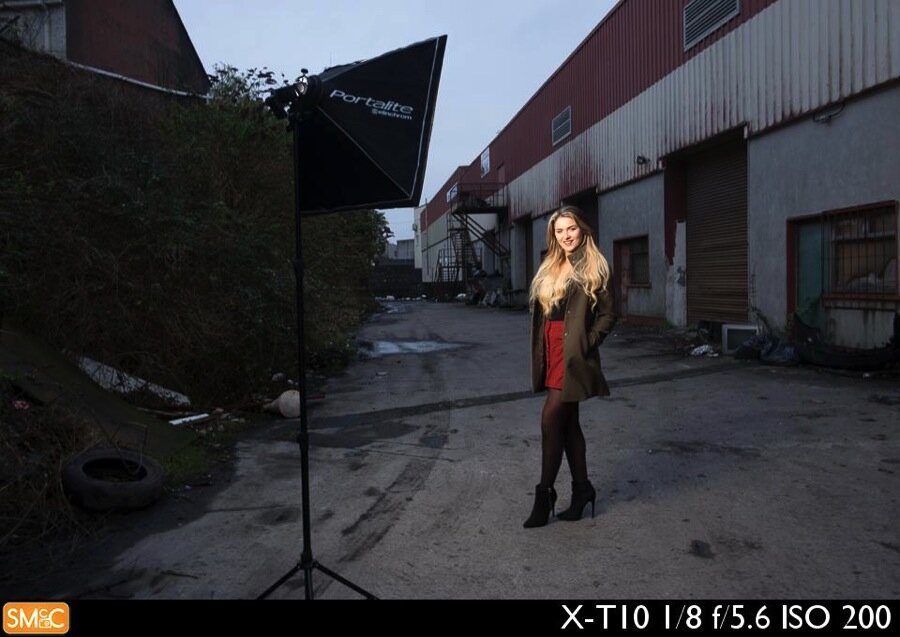 I shoot a lot of Butterfly Lighting, which is a straight on light look with a butterfly shaped shadow under the nose. It’s something that can be done with a TTL cable so for this I thought we’d go for a more dramatic look, and use a Short-lit Loop lighting pattern instead. This means placing the light off to the side of the subject to create shadow on the face. It has the effect of sliming the face. You can see a more extreme version of short lighting with my Hirsute project.To begin, I metered the surrounding area with no flash, and then brought the shutter speed down to darken it. With manual flash, the flash power is tied to the lens aperture, so you need to change shutter speed to prevent the flash power changing. TTL flash will deal with whatever you send at it, so technically I could have darkened by changing either shutter speed or aperture.
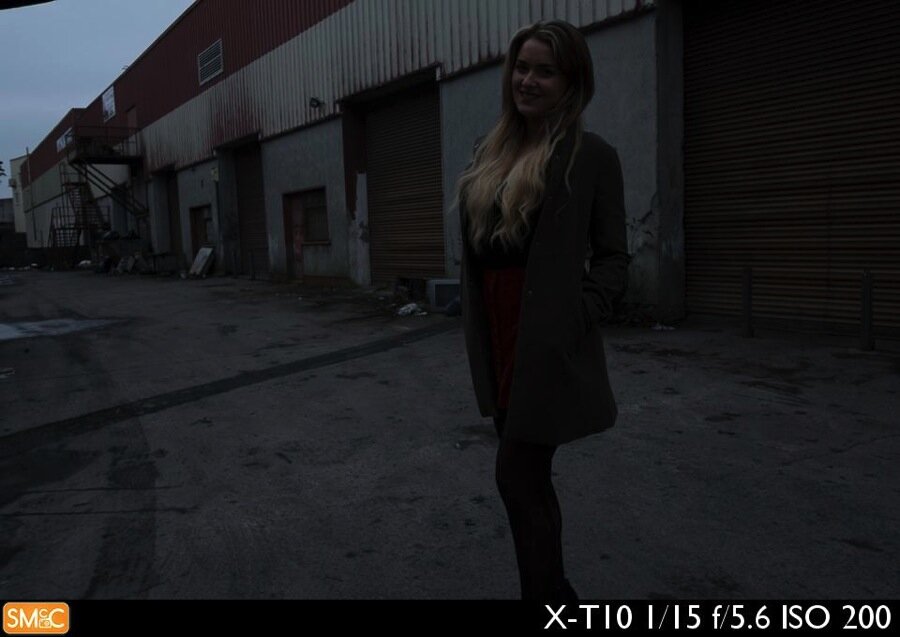 Next I turned on the triggers, and the flash. Now this is a review, so I have to say that I had a lot of trouble getting the camera to talk to the flash. Pressing the button on the transmitter would trigger the flash, but it refused to trigger from the camera, even though the flash symbol was on the camera. I did’t have my tablet with me to connect to the triggers to check what was going on, so I had to use Laura’s phone to download the app to see what was going on. Still no joy. In the end I went and changed the mode of the flash to Red-eye on, and miraculously it all worked. It definitely worked before in the other mode, so I wasn’t sure what happened. John from Serene Automation emailed to say he had a new foot for the transmitter which should solve all the communication problems. Either I could send it back, or he could send me the part. Being techie anyway, I said to send the part on. More on this shortly.Anyway, with the flash now firing, off we went. The light was fading and I was at a pretty low shutter speed, so we only went for a few quick looks. The first thing to note is that the exposure was really close. TTL itself is typically hit and miss (as distinct from the triggers which are merely relaying this information). Bearing in mind that I was underexposing the scene, and lighting an off center subject, I was pretty impressed.
 For the next shot, we moved to one of the shutters in the background to use it as background. Again, I was going for a short lit look. Here's how it looked.
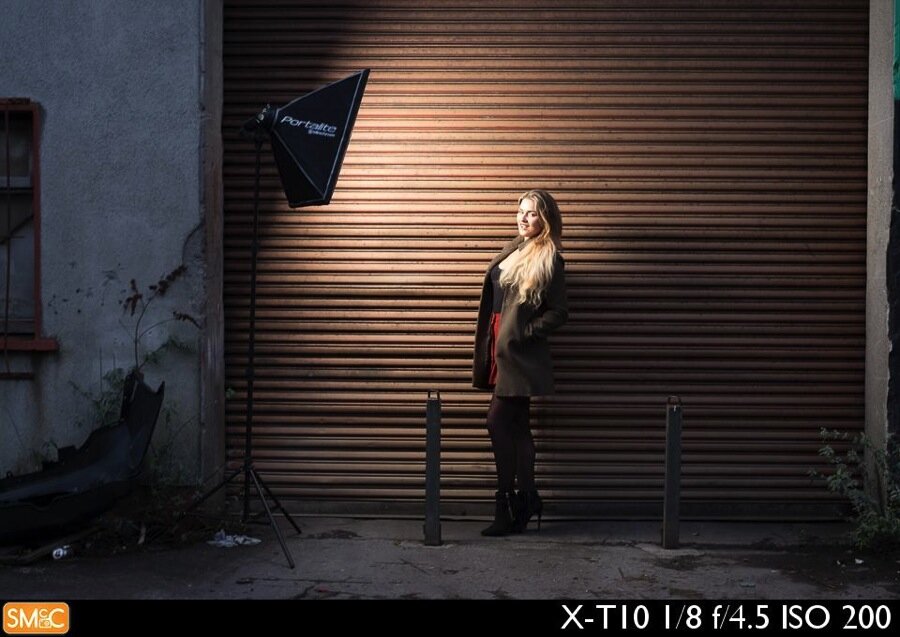 I shot a 3/4 shot first, and then a full length. TTL tends to suffer when you switch from tighter to wider shots, but this performed really well.
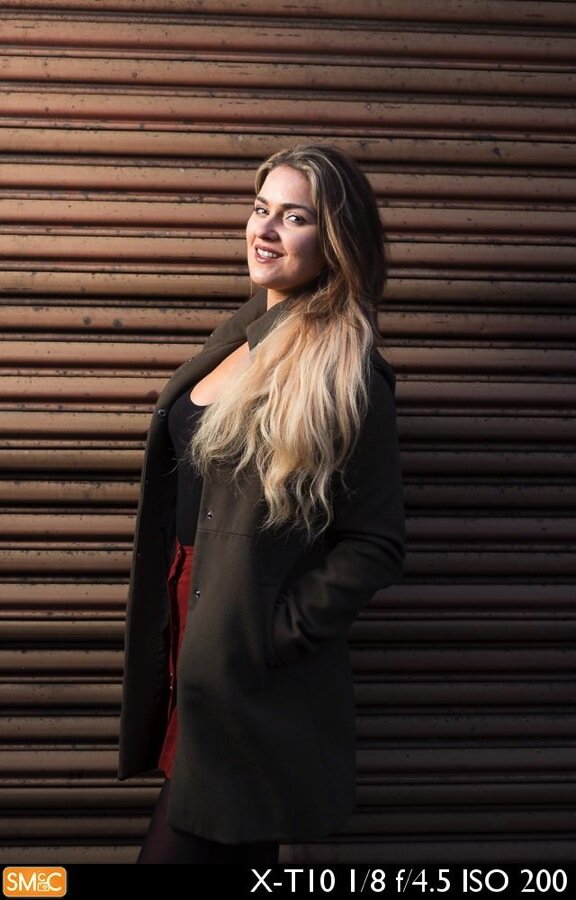 The full length is probably about 1/3 stop brighter is appearance, but this is still really good for TTl. Now bear in mind that the trigger is only relaying the TTL information, but seeing these makes TTL look more useful than I've felt before. You can always use the App to change the Flash Exposure Compensation-either overall, or one each attached flash. It's still possible to use the FEC option on the camera as well.
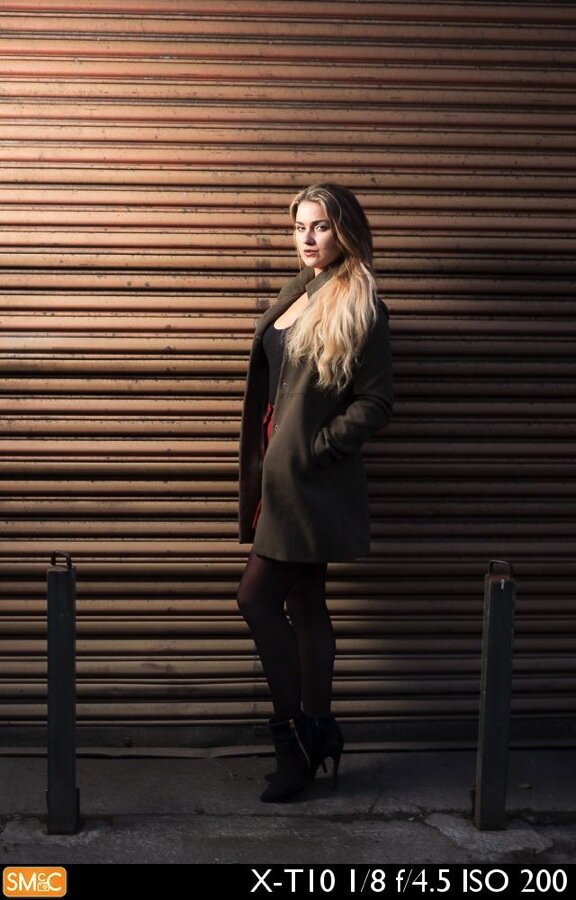 I've talked about the Nikon flash compatibility, so for the sake of testing, I borrowed an SB-700 from my good friend and photographer Julia Dunin. We only had a really short shoot window, and it was rather windy, so this ruled out a softbox. So some quick location scouting later, we shot in front of a local bingo hall.
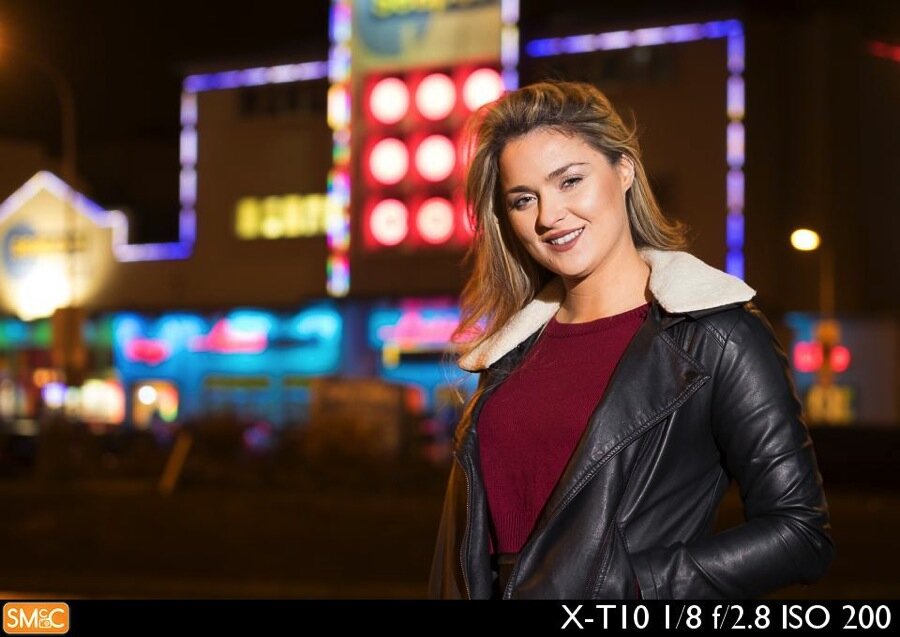 Again the exposure was great. As you can see from the setting, I set my base exposure for the background. 1/8 sec isn't great for camera shake, but it's fine in this shot.On another job, I had the triggers in the bag, so I pulled them out to give me some off camera effects with TTL. I was moving around a lot, so manual settings were out of the question. I varied between bouncing the flash and using direct flash, and the exposures were all very close.
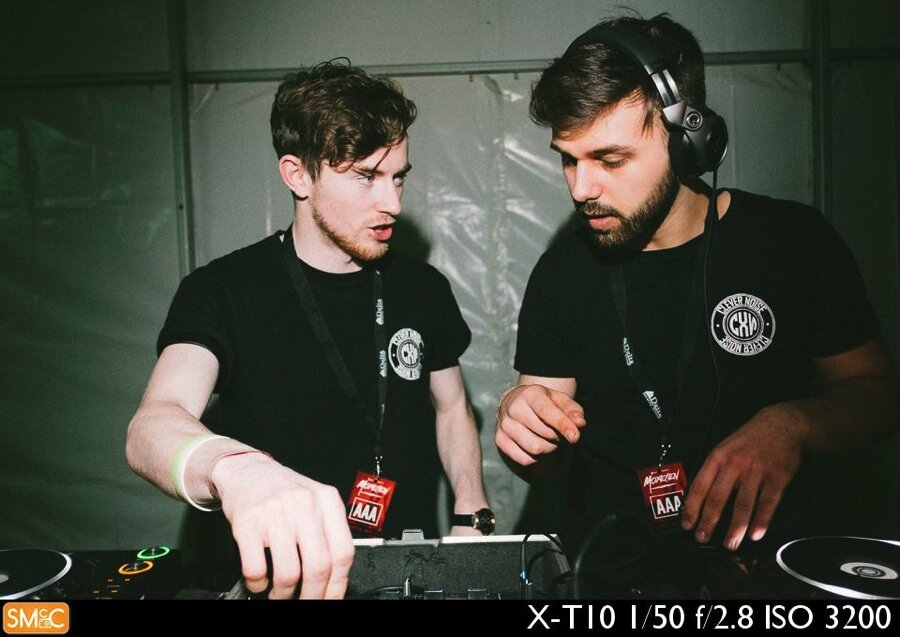 This next one is bounced off the DJ table-which was black, but still had enough light to give soft under fill.
 The Hardware UpgradeI've said I'll come to this twice, so here it is. John sent me the new foot for the transmitter. It was actually a really easy job. There are 4 screws to undo and then a little care is needed to line up pins to a block, but that's it. Here's how I did it.This is the new foot (with white plastic), beside the MX-20 trigger. The old one has black plastic.
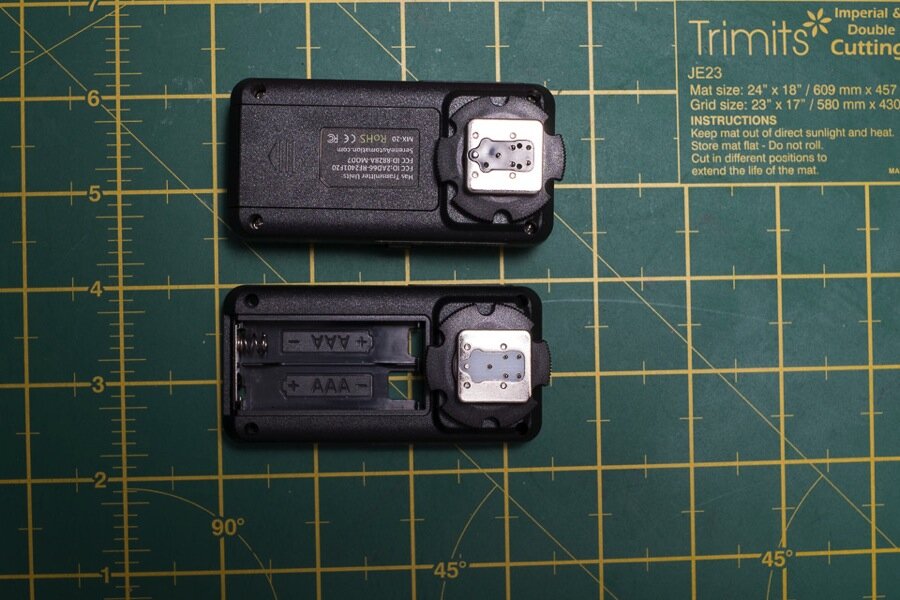 Next, unscrew the 4 corner screws, then gently prize the case apart.
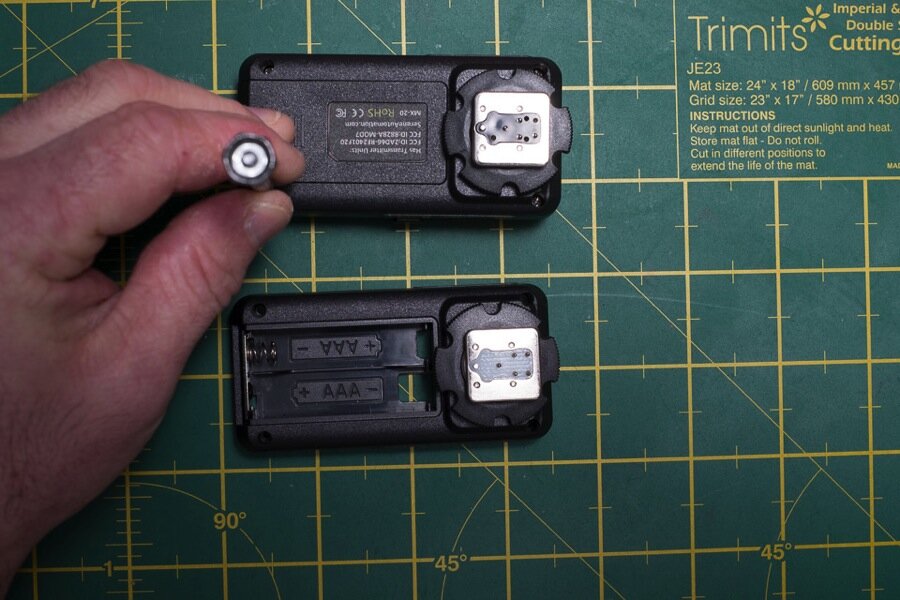 Here's the old and new foot side by side. See the black block in the centre part? The one on the new foot needs to mate with the pins visible on the top right of the left part in the shot. Line them up carefully then give the units a quick test before screwing the 4 screws back in. This is to make sure you've lined them up and that it's working before finalising the job.
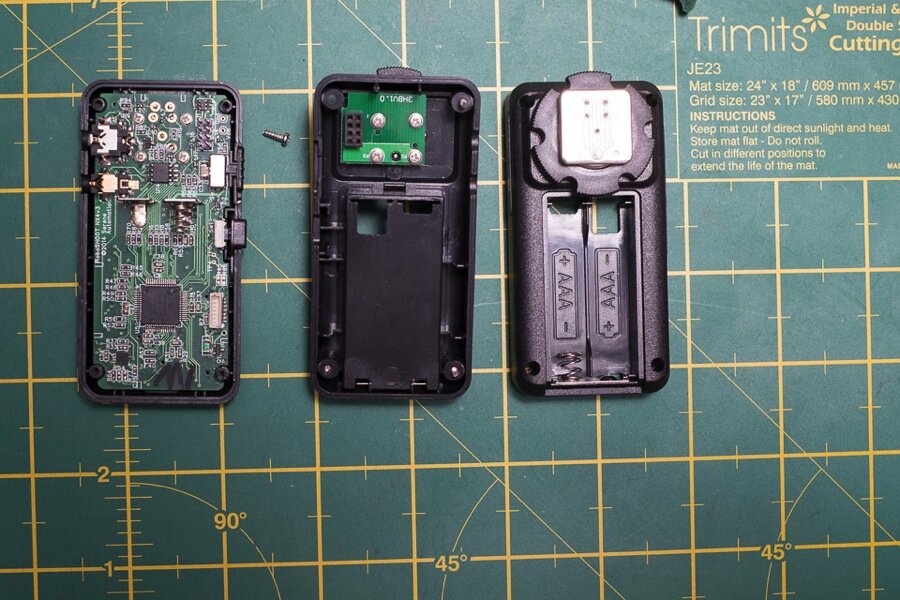 Here's the final look with the old foot off to the side.
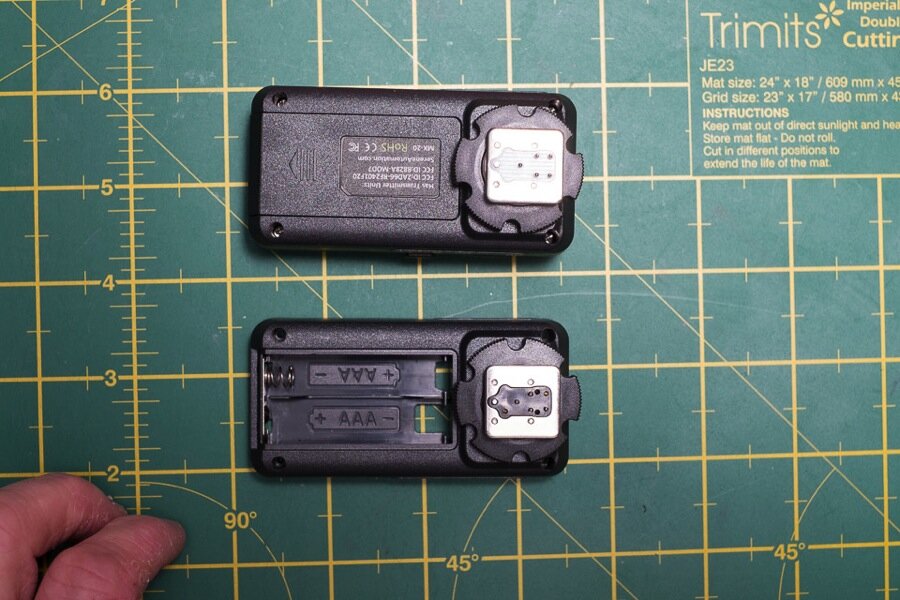 So what's the verdict on the upgrade? Well it's perfect. No fiddling or wiggling required anymore. It's worked every time since. Best of all this upgrade is free (bar the cost of shipping). John will do it for you for free as well if you don't fancy going at it yourself, but it's quite easy if you are good with techie stuff.CostSo down to the nitty gritty. The RoboSHOOT comes as the MX-20 and RX-20 for the best operation. A set of these is $379.95 There are lower cost options as well, but there are less features with these. These are the MX-15 transmitter and the RX-15 receiver. The kit version of these is $259.95. You can also get an RX-20/MX-15 kit for $299.95. The RX-20 is available for $159.95 standalone, while the RX-15 is $129.95. The MX transmitters are only available in a kit.Price wise these are on the high end, but not dissimilar to other products that perform a similar task. The price is also dictated by the market as well. Production is done in 90 day intervals, and a 25% deposit secures your order.ConclusionsAs these were preproduction units, it was probably inevitable that I'd have minor issues with them. While frustrating at the time, they've been entirely solved with the hardware upgrade. At the time of writing, a new firmware upgrade was out to add flash firing in continuous mode on the X-T1, so features are being added, meaning you get additional value after purchase. John plans on adding HSS support when the EF-X500 comes out. Hopefully Fuji will add HSS to older bodies via firmware (currently only the X-Pro2 supports it).So what's my verdict? With the new upgrade, the units have performed well, with no need to resort to the app. If you have a compatible phone, the lack of a screen isn't really an issue. The inclusion of the hot shoe pass through means that I can use my existing systems with them. If you want remote TTL via radio, there is nothing else out there-even when Fuji brings in wireless TTL in May, it'll be optical and require line of sight. Fortunately, despite being the only option, these triggers work well and have future proofing built in off the bat. If remote TTL on Fuji is your thing, I highly recommend these trigger. While the may be the only game in town, it's a good game.